If you’re looking to access websites or online services that are not available in your region, you may need to use a proxy server to bypass the restrictions.
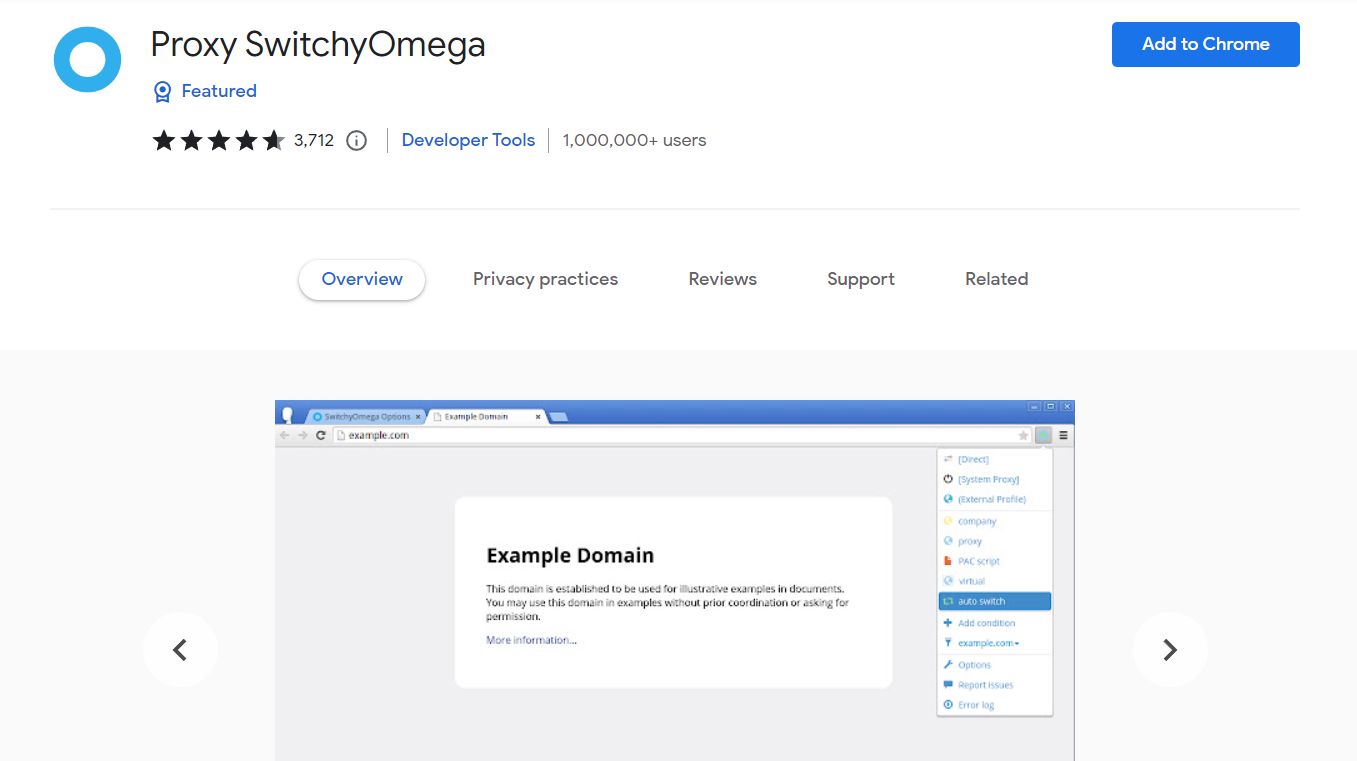
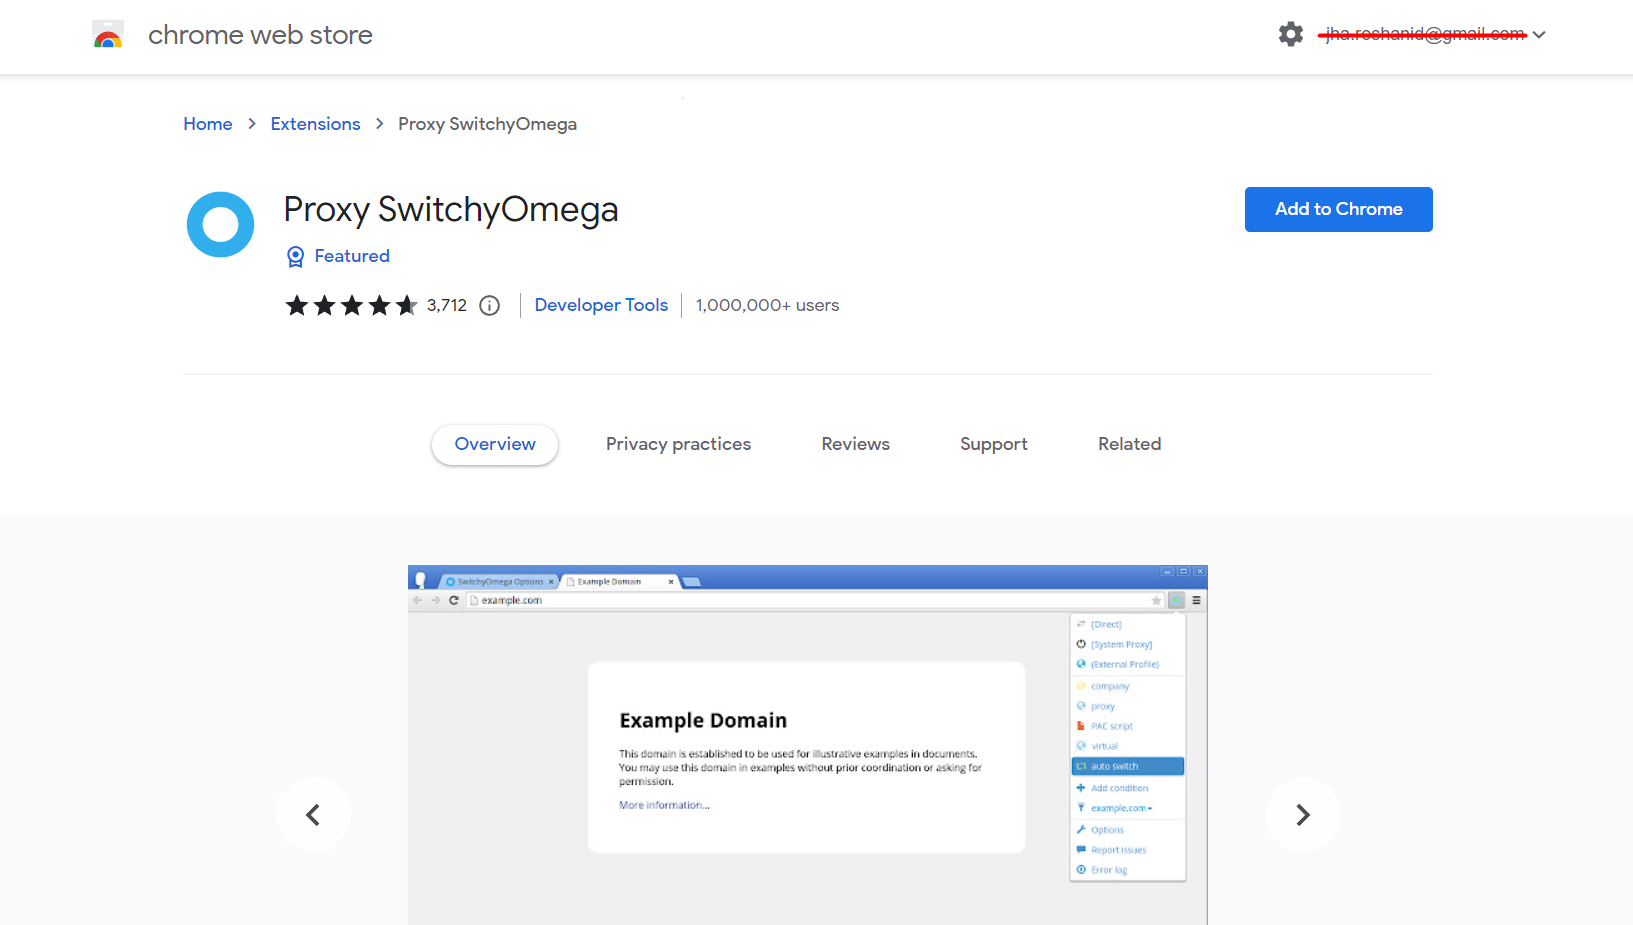
Proxy SwitchyOmega is a popular Chrome extension that allows you to easily manage and switch between multiple proxy servers from within your browser.
In this article, we’ll walk you through the steps to install and use Proxy SwitchyOmega on Chrome.
What is Proxy SwitchyOmega?
Proxy Switchy Omega is a free and open-source Chrome extension that allows users to easily manage and switch between multiple proxy servers from within their browsers.
With Proxy Switchy Omega, users can configure and save multiple proxy server settings and then easily switch between them as needed.
Proxy Switchy Omega was developed by Mhd Hejazi and is available for download from the Chrome Web Store. The extension is designed to be user-friendly and easy to use, even for users who are not familiar with proxy servers or networking concepts.
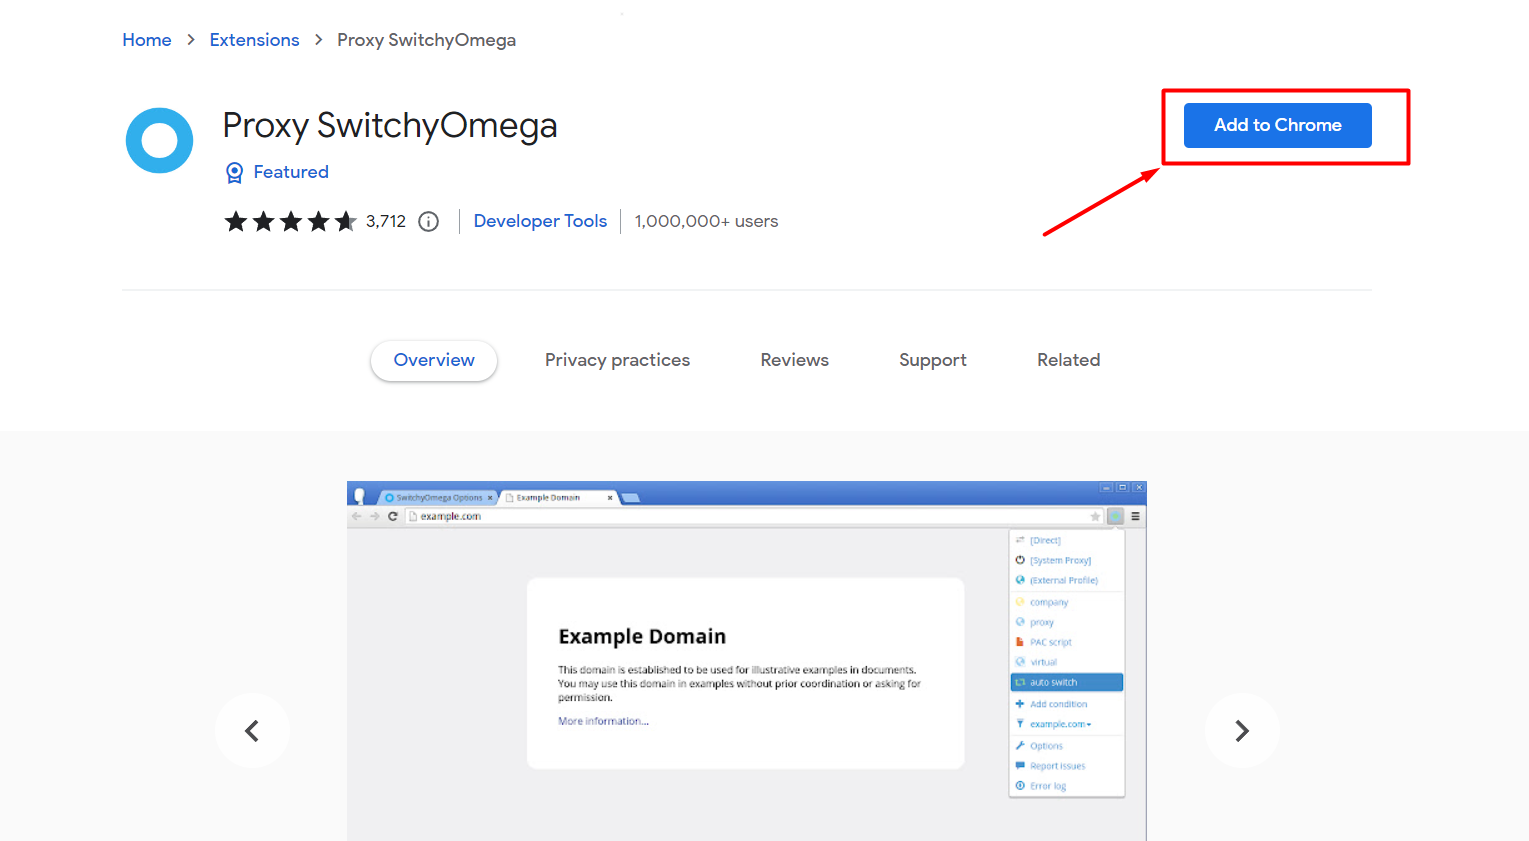
To use Proxy Switchy Omega, users must first install the extension on their Chrome browser. Once installed, the extension adds an icon to the top right corner of the browser window.
Clicking on the icon opens a drop-down menu that allows users to configure and manage their proxy server settings.
With Proxy Switchy Omega, users can configure multiple proxy servers with different IP addresses, port numbers, and authentication settings.
The extension also allows users to create and save multiple proxy profiles, which can be customized and switched between as needed.
Benefits of Using Proxy SwitchyOmega
One of the main benefits of using Proxy Switchy Omega is that it allows users to bypass geo-restrictions and access online content that may be unavailable in their region.
For example, users can use a proxy server located in a different country to access websites or online services that are restricted or unavailable in their own country.
Additionally, Proxy Switchy Omega can be useful for users who want to protect their privacy while browsing the internet. By using a proxy server, users can hide their IP address and prevent websites or online services from tracking their online activities.
However, it’s important to keep in mind that using a proxy server can also have potential drawbacks. For example, using a proxy server can slow down your internet speed, and some proxy servers may be untrustworthy or compromised, which can expose users to security risks or malware.
To ensure that you are using a safe and reliable proxy server, it’s important to choose a reputable Proxy Switch software or service and only use proxy servers that are secure and trustworthy.
Additionally, it’s important to always use caution and common sense when browsing the internet, especially when accessing sensitive or personal information online.ac
Configuring Proxy SwitchyOmega
After installing Proxy SwitchyOmega, you’ll need to configure the extension with the proxy server settings that you want to use. Here’s how to do it –
Step – 1: Click on the Proxy SwitchyOmega icon in the top right corner of your browser.
Step – 2: Select “Options” from the drop-down menu.
Step – 3: In the “Profiles” section, click on the “Add Profile” button to create a new profile for your proxy server.
Step – 4: Enter a name for your profile and select the “Manual Configuration” option.
Step – 5: Enter the details for your proxy server, including the IP address, port number, and any
authentication information that may be required.
Step – 6: Click “Save” to apply your settings.
Creating and Saving Proxy Profiles
In addition to configuring individual proxy servers, you can also create and save multiple profiles in Proxy SwitchyOmega. This allows you to switch between different sets of proxy servers depending on your needs.
Here’s how to create and save a new profile –
Step – 1: Click on the Proxy SwitchyOmega icon on the top right corner of your browser.
Step – 2: Select “Options” from the drop-down menu.
Step – 3: In the “Profiles” section, click on the “Add Profile” button to create a new profile.
Step – 4: Enter a name for your new profile and configure the proxy server settings as needed.
Step – 5: Click “Save” to save your new profile.
Step – 6: To switch between different profiles, click on the Proxy SwitchyOmega icon and select the profile you want to use from the drop-down menu.
Troubleshooting Proxy SwitchyOmega
If you encounter any issues while using Proxy SwitchyOmega, here are some troubleshooting steps you can try –
Step – 1: Check your proxy server settings to make sure they are correct.
Step – 2: Try disabling any other proxy or VPN services you may have running in the background, as they could be conflicting with Proxy SwitchyOmega.
Step – 3: Clear your browser cache and cookies and restart Chrome.
Step – 4: Update to the latest version of Proxy SwitchyOmega to make sure you are running the most stable and up-to-date version of the extension.
Quick Links:
- How to Add Proxies to BP Proxy Switcher?
- How to Set Up Chrome Proxy Settings?
- Top 10 Best Canada Proxy Providers
- 10 Best Mobile Proxy Providers
Final Thoughts: How to Use Proxy SwitchyOmega on Chrome
Proxy SwitchyOmega is a powerful and user-friendly tool for managing and switching between multiple proxy servers from within your Chrome browser.
By following the steps outlined in this article, you should be able to easily configure and use the extension to access blocked websites and services.
Keep in mind that using a proxy server may slow down your internet speed, so make sure to only use it when necessary. Additionally, always be cautious when using public or untrusted proxy servers, as they may be insecure or compromise your privacy.