If you are looking for the best export settings for Premiere Pro you have landed on the correct page.
There is no one-size-fits-all answer to the question of what the best export settings are for Premiere Pro. However, there are a few things you can do to optimize your exports for the best results.
First, make sure that you have selected the proper codec and resolution. Premiere Pro offers a wide range of codecs and bitrates, but not all of them are available for every export format. Some formats also require you to select the proper aspect ratio of your video.
Next, make sure that you have selected the best settings for your needs. Premiere Pro offers several different options for each codec, resolution, and frame rate combination.
Different combinations will yield different results, so it is important to experiment until you find the settings that work best for your project.
Finally, make sure that your computer is capable of handling the export. If you are exporting a high-resolution video, your computer may not be able to handle the workload.
In this case, you may need to lower the resolution of your exported video or you may need to export your video as an uncompressed file.
To give you a better idea of what the best settings are for every scenario, we will go through some examples and show you which codecs work best for different scenarios.
While you will need to do some experimenting on your own, this article should give you a good starting point for creating the best exports.
Set in and Out
When exporting from Premiere Pro, there are a variety of settings you can choose from to output your video. In this article, we will go over the best export settings for Premiere Pro and explain what each one does.
First, let’s start with the basics. Under the “File” menu, there are three export options: “Export Video,” “Export Audio,” and “Export Media.” The first option, “Export Video,” is what we will be focusing on in this article.
The “Export Video” window has a variety of settings that you can adjust:
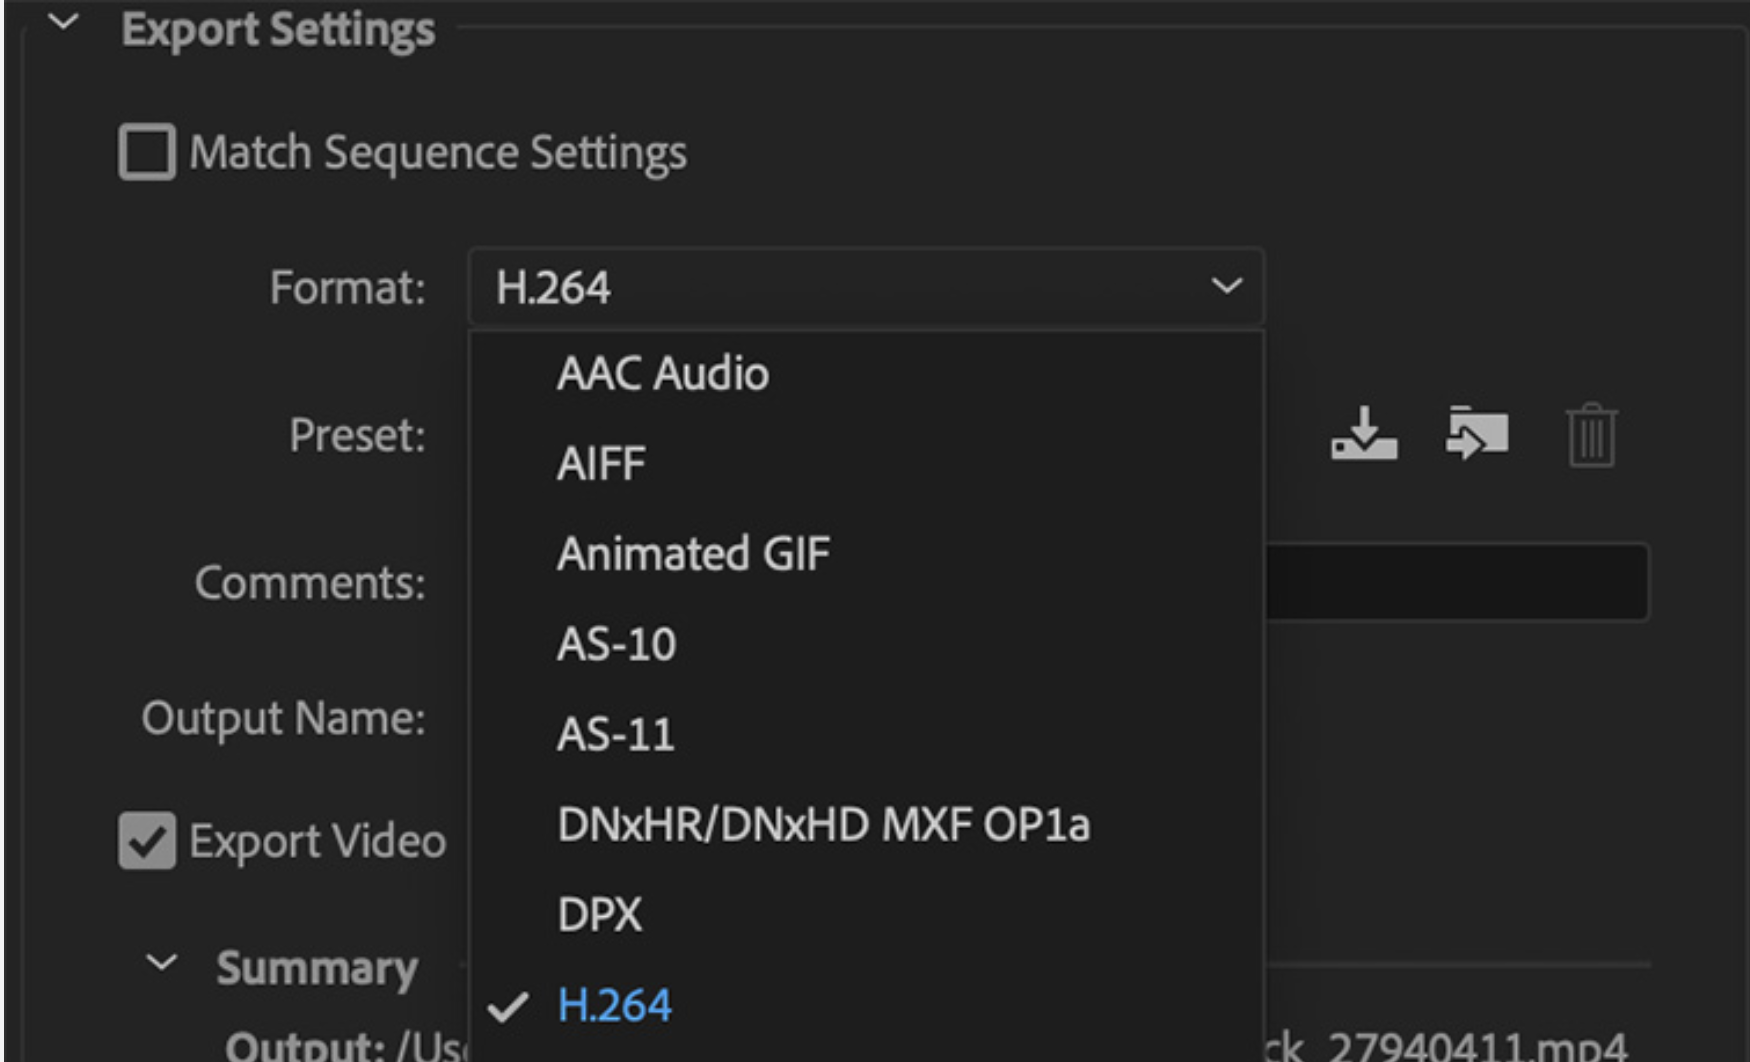
- Output Format – This setting lets you choose the file format for your exported video. Premiere Pro offers many different formats, including ProRes, H.264, and MPEG-2.
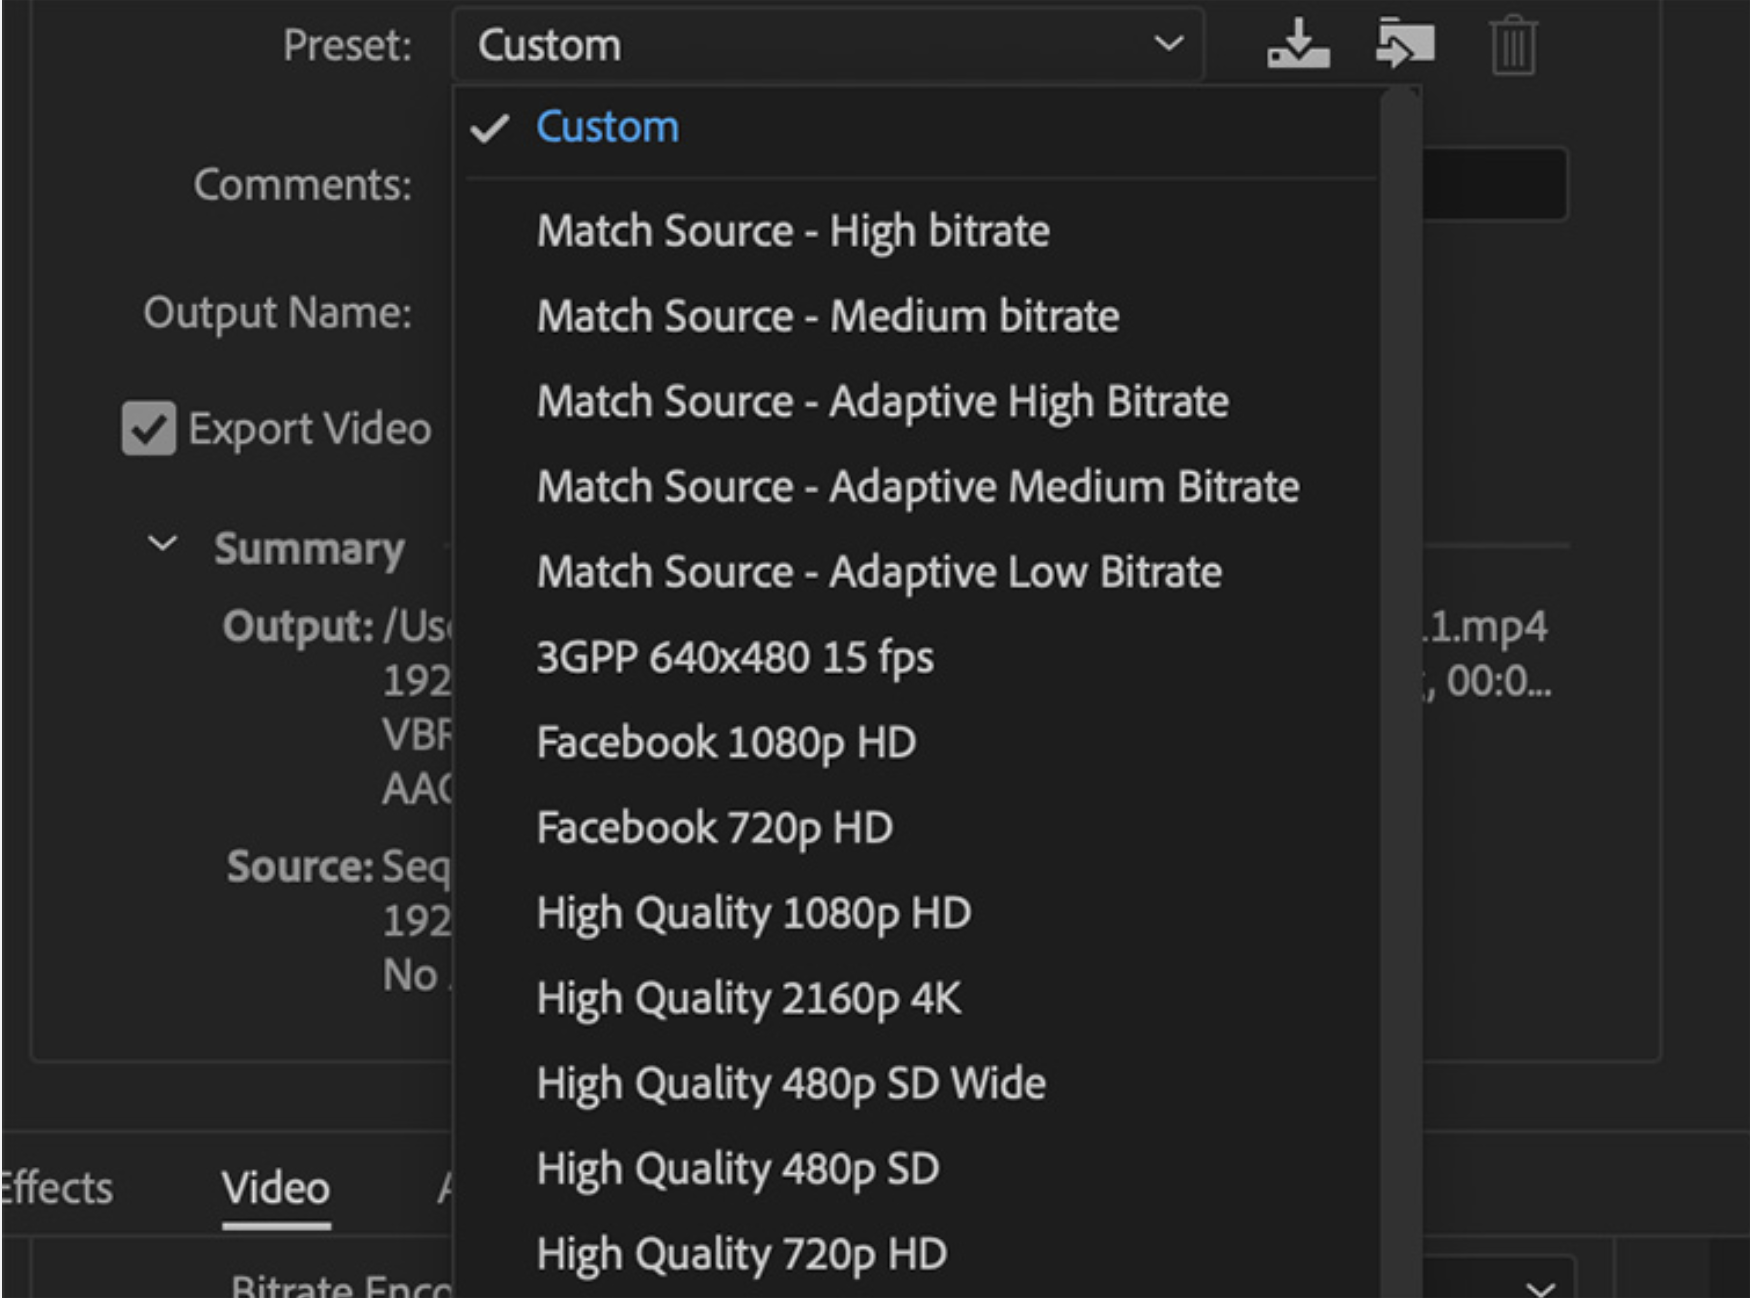
- Preset – This setting allows you to choose a preset that will automatically adjust the other export settings for you. There are many presets available, including YouTube, Facebook, and Vimeo.
- Resolution – This setting lets you choose the resolution of your exported video.
- Bitrate – This setting lets you choose the bit rate of your exported video. The higher the bit rate, the higher quality of the exported video will be. However, a higher bit rate will also result in larger file size.
- Audio Channels – This setting lets you choose the number of audio channels for your exported video.
- Audio Format – This setting lets you choose the audio format for your exported video. Premiere Pro offers many different audio formats, including AAC, MP3, and WAV.
Export Menu
The export menu can be found in the main toolbar and provides the ability to save your work in a variety of formats. These include PDF, HTML, RTF, and plain text. The export menu also includes options to save a copy of the document as a Web page or to send it as an email attachment.
In addition to these specific export options, the file can be exported to any application installed on your computer that is capable of opening files containing HTML, images, movies, etc.
For example, you may choose to save the document as a PDF file for distribution via email to colleagues or friends at work. You can also find several alternative programs listed in this menu.
When exporting a document, you have the ability to choose the following:
The file format to save as (PDF, HTML, RTF, Text). The name of the file. The location on your computer where the file will be saved The compression setting for PDF files (optional) Whether to include special document components (embedded movies, sound clips, etc.)
Whether to create a compressed version of the file that requires a password to open. This option only appears if the document contains Macromedia Flash files or files that may be opened as security risks.
Note: this does not provide any additional security from being viewed by unauthorized people.
An export menu is a powerful tool that provides a variety of options for saving your work in different formats. By understanding the different options available, you can save your documents in the most appropriate format for your needs.
PDF files are widely used to distribute documents because they can be opened on most computers without requiring any additional software. PDF files can also be password protected to limit unauthorized people from accessing the information.
Quick Links:
- How to Install the DirecTV App on Firestick & Fire TV?
- How To Delete Apps On iPad?
- How To Edit Theme Files Without Cpanel In WordPress?
Conclusion: Best Export Settings For Premiere Pro 2024
Assuming you’ve followed the advice in this article so far, your export settings for Premiere Pro should now be optimized for quality and performance.
But what if you need to export a file for a specific purpose or delivery format? In that case, you may need to adjust your settings accordingly.
If you’re exporting for the web, try using the H.264 or MPEG-4 codecs with a bitrate of around 500-800 kbps. For high-resolution projects, you may need to use a higher bitrate (up to 3,000 kbps). Be sure to use a codec that is compatible with the delivery format you’re using.
If you’re exporting for broadcast, you’ll need to use a different codec and higher bitrate. The most common broadcast codecs are MPEG-2 and H.264. For MPEG-2, use a bitrate of around 18-20 Mbps, and for H.264, use a bitrate of around 25 Mbps.
Keep in mind that these are just guidelines. If you need to compress footage more to accommodate low bandwidth, I highly recommend using Sorenson Squeeze (3.5.2), as it’s extremely quick and simple to use.
If you’re exporting for DVD, your best option is H.264 or MPEG-4 with a high-quality set of “High” or “Very High.” For Blu-ray discs, use the MPEG-2 codec with a bitrate of around 28 Mbps.